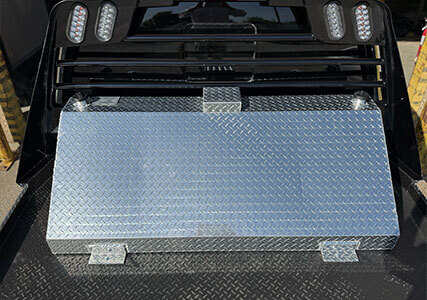
Safety Precautions
- Read entire installation instructions prior to installation.
- Use proper eye and hand protection during any installation.
- Do not connect or disconnect any wires with ignition in the on position.
- Do not modify or substitute any component.
- Any questions regarding installation, please contact your dealer.
- Warranty will be voided if installation is not followed as per installation instructions.
Required Tools
- 3/4" Hole Saw and Drill
- 3/4" Wrench
- 3/8" Hex Bit
- Box Cutter
- Wire Strippers and Crimps
- 1/2" Drill Bit
- Remove ¾” bolt and 3” washer from headache rack.
- Using a ¾” hole saw, drill a ¾” hole using attached diagram for your model truck for the wire harness. It may be necessary to file or remove any sharp burrs or edges from the hole.
NOTE: Some vehicle models have plugs and/or covers for the stake pockets. Carefully remove the plugs and covers from the top and side of the stake pockets.
- Carefully run the supplied wire harness through the drilled ¾” hole. Wire harness should follow through hole to underneath the truck body.
- Carefully place aluminum headache rack mounts to the inside of the trucks stake pockets. NOTE: The Aluminum Headache Rack is designed to fit snug.
- Using previous removed ¾” bolts and 3” washer, tighten bolts and washers to headache rack. NOTE: DO NOT CROSS THREAD OR OVER TIGHTEN BOLTS.
- Using supplied 3/8” Self-Tapping Screws, attach 3 per side. Do not over tighten.
- Route the wire harness containing (Green, White, Yellow, Brown, and Purple) to the rear of the truck. Ensure the wire harness is routed away from any moving parts or exhaust system. Use supplied wire ties, to secure harness. NOTE: If aluminum headache rack has optional Duel LED Work Lights and/or 52” LED Light Bar, route supplied wire harness to the front of the truck.
Helpful reference guide to identify factory light wire color. NOTE: Not a complete list, please reference the owner’s manual for current wire colors.
Wire Color by Vehicle Manufacturer (Reference Only)
Dual Purpose Bulb System
| Wire Function | Wire Color | GMC | Ford | Chrysler | Jeep | Toyota | Honda | Mazda |
|---|---|---|---|---|---|---|---|---|
| Right Turn & Brake Lights | Green | Green | Orange w/ Blue Stripe | Brown | Brown | Green w/ Yellow Stripe | Green w/ Yellow Stripe | Green w/ Yellow Stripe |
| Left Turn & Brake Lights | Yellow | Yellow | Light Green Orange Stripe | Dark Green | Grey w/ Black Stripe | Green w/ Black Stripe | Green w/ Blue Stripe | Black Stripe |
| Tail Lights/Running Lights | Brown | Brown | Brown | Black w/ Yellow Stripe or Black | Blue | Red w/ Green | Red w/ Black Stripe | Green or Black Stripe |
| Ground | White | Black | Black or Grey | Black | Black | Black or White | Black | Black |
Single Purpose Bulb System
| Wire Function | Wire Color | GMC | Ford | Chrysler | Jeep | Toyota | Honda | Mazda |
|---|---|---|---|---|---|---|---|---|
| Brake Lights | Use Converter | Pink or Light Blue | Red w/ Green Stripe | White | Blue w/ Black Stripe | Green w/ Red or White Stripe | Green w/ White Stripe | Green or Green w/ Red Stripe |
| Backup Lights | Red | Lt Green | Black w/ Pink | Violet | Brown | - | - | - |
| Electric Trailer Brakes | Connect To Blue Wire From Brake Controller | |||||||
(Trailer Plugs for Reference Only)


- Using supplied Posi-Tap Tap Connectors, attach aluminum headache rack wires to corresponding factory haness colors.
- Green to Right Turn/Brake
- Brown to Running
- Purple to Reverse/Back-up
- Yellow to Left Turn/Brake
- White to Chassis Ground

Optional Light Package Only
For Use with Duel LED Works Lights and/or 52” LED Light Bar
- Inside Cab, Carefully drill a ½” hole for mounting of the rocker switch in desired location. (One rocker switch per light option) Ensure you are not drilling into a factory harness and no factory bracket will interfere with mounting of the rocker switch.
- Connect the Rocker Switch Green Wire to Chassis Ground. Connect Rocker Switch Orange Wire to 12 Volt Power Source. NOTE: Spare, Auxiliary, Upfitter, or SEO fuses are not used in any factory systems and should be used when adding any accessory part. Connect the remaining Rocker Switch wire harness(s) through the fire wall. Use a small grommet (not included) or factory rubber boot when routing wire through the fire wall to insure wires do not chaff or create a short. Insure the wires do not come in contact with any moving parts or exhaust componets. Connect the Rocker Switch Red wire to Headache Rack Red Wire.
IMPORTANT NOTE
The Aluminum Headache Rack is not designed for use as a safety device. Will not protect in the event of a roll over situation. The Aluminum Headache Rack is not designed to replace or substitute the factory lights. Please visit our website for the most current and up to date information, www.attatank.com.


